Right, let’s address the elephant (or rather, enormous bird) in the room: cooking a Christmas turkey is terrifying. It’s expensive, it’s massive, everyone’s watching, and if you mess it up, you’ve ruined Christmas. No pressure.
But here’s the secret: it’s actually not that hard. Yes, it takes ages. Yes, you need to get up stupidly early. But if you follow a few simple rules, you’ll end up with a perfectly cooked turkey that’s moist, delicious, and doesn’t resemble shoe leather.
This is your complete, no-nonsense guide to cooking a Christmas turkey. From choosing the right size to carving the finished bird, we’ve got you covered.
- Choosing Your Turkey
- Essential Equipment
- Preparing Your Turkey
- Cooking Times & Temperatures
- During Cooking
- Resting: The Crucial Step Everyone Forgets
- Common Turkey Disasters (And How to Avoid Them)
- Carving Your Turkey
- Gravy from Turkey Drippings
- Alternative Cooking Methods
- Timeline: Your Christmas Day Cooking Schedule
- The Bottom Line

Choosing Your Turkey
Size Matters
The basic rule: 450g (1lb) per person, plus a bit extra for leftovers (and you definitely want leftovers).
Realistic sizing:
- 4-6 people: 3-4kg turkey
- 6-8 people: 4-5kg turkey
- 8-10 people: 5-6kg turkey
- 10-12 people: 6-7kg turkey
- 12+ people: 7kg+ turkey (or consider two smaller birds)
Honest advice: Most families buy a turkey that’s too big. We all want leftovers, but there’s a limit. If you’re feeding 6, a 5kg bird is plenty. You don’t need an 8kg monster.
Fresh vs Frozen
Fresh Turkey:
- Better flavour
- Easier to prepare
- More expensive
- Needs collecting 1-2 days before Christmas
- Must be cooked within a few days
Frozen Turkey:
- Cheaper
- Can buy weeks in advance
- Needs proper defrosting (crucial!)
- Slightly less flavour
- Takes up freezer space
The defrosting rule: If you buy frozen, it needs to defrost in the fridge for 24 hours per 2.5kg. A 5kg turkey needs TWO DAYS in the fridge to defrost properly. Don’t rush this—partially frozen turkey won’t cook evenly and could make people ill.
Free-Range vs Standard
Free-range/organic:
- Better welfare standards
- Usually better flavour
- More expensive (£60-100+)
- Need to pre-order
Standard:
- Much cheaper (£20-40)
- More readily available
- Perfectly fine for most families
Bronze vs white turkey: Bronze turkeys are traditional breeds with more flavour but less breast meat. White turkeys have been bred for maximum breast meat. Both are fine—choose based on preference and budget.
Essential Equipment
Before you start, make sure you’ve got:
- Large roasting tin (turkey must fit comfortably)
- Roasting rack (keeps turkey out of fat)
- Tin foil (loads of it)
- Meat thermometer (game-changer for checking doneness)
- Basting brush or spoon
- Sharp carving knife
- Kitchen string (for trussing, optional)
- Patience (non-optional)
Preparing Your Turkey
The Night Before
Remove giblets: Check inside both cavities (neck and body). Remove the bag of giblets (neck, heart, liver, gizzard). Use them for gravy or bin them—your choice.
Pat dry: Use kitchen paper to thoroughly dry the turkey inside and out. Dry skin = crispy skin.
Seasoning: Season generously inside and out with salt and pepper. Some people add butter under the breast skin now—it helps with moisture and flavour.
Leave uncovered in fridge: Put the turkey on a tray, uncovered, in the fridge overnight. This dries the skin out further, leading to crispier results.
Christmas Morning Prep
Bring to room temperature: Take the turkey out of the fridge 1-2 hours before cooking. Cold turkey takes longer to cook and won’t cook evenly.
Stuff or not stuff? Traditional: stuff the cavity with stuffing Modern/safer: cook stuffing separately
Stuffing inside the bird tastes amazing but increases cooking time and food safety risks. Cooking it separately is easier and safer.
Cavity aromatics: Instead of stuffing, add:
- Halved onion
- Lemon halves
- Fresh herbs (thyme, rosemary, sage)
- Garlic cloves
These add flavour without the food safety worries.
Butter the bird: Smother the breast in softened butter (or oil). Lots of it. Under the skin if possible, definitely all over the outside.
Bacon blanket (optional): Lay streaky bacon rashers over the breast. Protects it from drying out, adds flavour, and you get crispy bacon at the end. Win-win-win.
Cooking Times & Temperatures
The Formula
Basic cooking time:
- Under 4kg: 20 minutes per kg, plus 90 minutes
- Over 4kg: 20 minutes per kg, plus 70 minutes
Examples:
- 3kg turkey: 2.5 hours (1 hour + 1.5 hours)
- 4kg turkey: 3 hours (1hr 20min + 1hr 40min)
- 5kg turkey: 3 hours 40 minutes (1hr 40min + 2 hours)
- 6kg turkey: 4 hours (2 hours + 2 hours)
- 7kg turkey: 4 hours 20 minutes (2hr 20min + 2 hours)
Oven temperature: 180°C (160°C fan) / Gas Mark 4
The Tin Foil Trick
Start covered, finish uncovered:
- First 2/3 of cooking: Cover turkey loosely with foil (stops breast drying out)
- Last 1/3 of cooking: Remove foil (lets skin go golden and crispy)
Example: 6kg turkey cooking for 4 hours
- First 2 hours 40 minutes: covered with foil
- Last 1 hour 20 minutes: foil removed
How to Know When It’s Done
The thermometer method (best): Insert a meat thermometer into the thickest part of the thigh (not touching bone):
- Done at 65-70°C
- Check in multiple spots
The juice method: Pierce the thigh with a skewer. Juices should run clear, not pink.
The leg wiggle: The leg should move freely in its socket when cooked.
When in doubt: Better overcooked than undercooked. Food poisoning ruins Christmas faster than dry turkey.
During Cooking
Basting
Every 45 minutes to 1 hour, open the oven and spoon pan juices over the turkey. This keeps it moist and helps browning.
Be quick: Every time you open the oven, temperature drops and cooking takes longer.
What If It’s Browning Too Fast?
Cover with foil earlier than planned. Simple fix.
What If It’s Not Browning?
Remove foil earlier, or increase temperature to 200°C for the last 20 minutes. Watch it carefully.
Resting: The Crucial Step Everyone Forgets
This is vital: Once cooked, the turkey needs to REST for at least 30-60 minutes before carving.
Why? Resting lets juices redistribute through the meat. Carve immediately and juices run everywhere, leaving dry meat. Rest properly and meat stays moist.
How to rest:
- Remove turkey from oven
- Cover loosely with foil
- Put in a warm spot (not cold draught)
- Leave for 30-60 minutes
- Use this time to make gravy, roast potatoes, panic about everything else
Bonus: Resting time lets you use the oven for other things without juggling space.
Common Turkey Disasters (And How to Avoid Them)
Dry Breast Meat
Why it happens: Breast cooks faster than legs, so by the time legs are done, breast is overdone.
Solutions:
- Start breast-side down for first hour (controversial but works)
- Bacon blanket over breast
- Butter under the skin
- Don’t overcook (use a thermometer!)
- Baste regularly
Turkey Not Cooked in Time
Prevention: Calculate cooking time properly and start early enough. If dinner’s at 2pm and turkey takes 4 hours plus 1 hour resting, turkey goes in at 9am.
Emergency fix: If it’s genuinely not done and everyone’s starving:
- Remove legs/wings, finish cooking them separately
- Carve breast meat, finish in gravy on the hob
- Order pizza (only half joking)
Turkey Cooked Too Early
Solution: Cover well with foil and towels, rest somewhere warm. Turkey stays hot for ages. 2 hours resting is fine.
Burnt Skin
Fix: Cover entirely with foil for remainder of cooking. Burnt skin looks bad but meat underneath is usually fine.
Oven Not Big Enough
Prevention: Measure your turkey and oven before Christmas Day.
Emergency fix:
- Remove oven shelves you don’t need
- Remove turkey from roasting tin, put directly on oven rack with tin underneath
- Cook turkey crown (just the breast) instead of whole bird
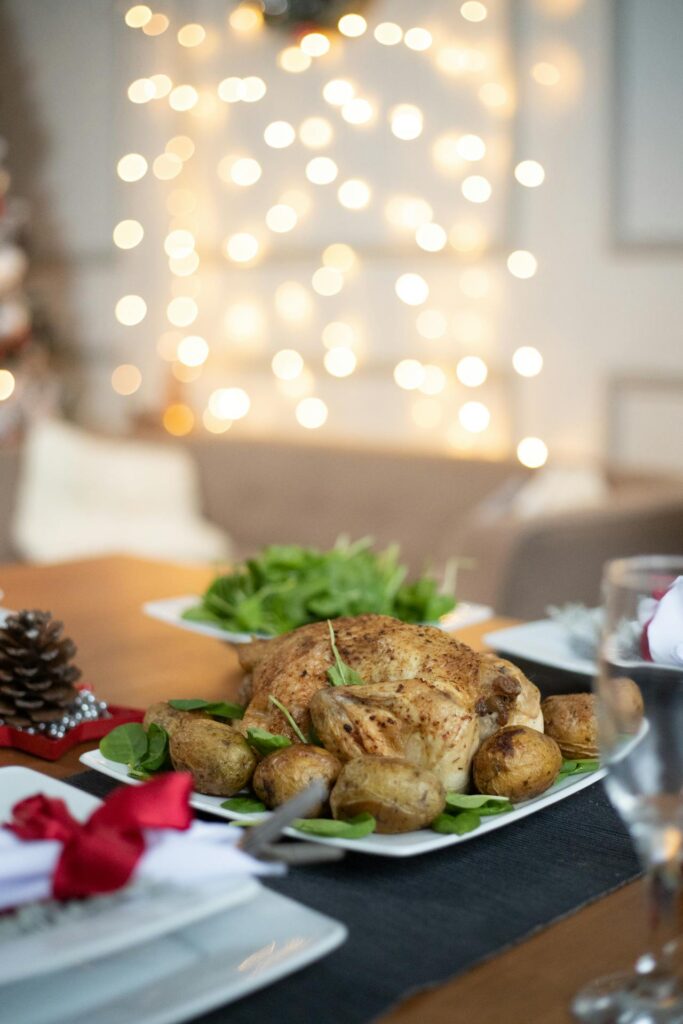
Carving Your Turkey
The Method
Equipment: Very sharp carving knife, carving fork, large board, serving platter.
Steps:
- Remove legs: Cut through the skin between leg and body, pull leg away, find the joint, cut through it. Repeat other side.
- Separate thighs from drumsticks: Find the joint, cut through. Set aside.
- Remove wings: Similar to legs—find joint, cut through.
- Carve the breast:
- Make a cut down alongside the breastbone
- Make horizontal cuts to release slices
- Slice downward in thin slices
- Repeat on other side
- Slice leg meat: Remove meat from thighs and drumsticks. This is fiddly—don’t stress if it’s messy.
Top tip: YouTube a quick carving video before Christmas Day. Seeing it done makes it much clearer.
Presenting the Meat
Options:
- Traditional: Whole carved turkey brought to table (impressive but cools quickly)
- Practical: Carved in kitchen, arranged on warm platters (meat stays hotter)
- Buffet style: Everything in serving dishes, people help themselves
Gravy from Turkey Drippings
Once turkey’s out, use those delicious pan drippings for gravy:
Quick method:
- Pour juices from roasting tin into a jug
- Let fat rise to the top, spoon off excess
- Put roasting tin on hob, add flour, stir into remaining fat
- Gradually add stock and the defatted juices
- Stir until thick, season well
- Strain if lumpy (no judgment)
Cheat’s method: Use the drippings to add flavour to shop-bought gravy. Nobody will know, and it’s loads easier.
Alternative Cooking Methods
Crown (Just the Breast)
- Much quicker (about half the time)
- Less waste if you’re not fussed about dark meat
- Easier to cook evenly
- More expensive per kilo
Turkey Portions
- Buy just turkey breasts, thighs, or legs
- Cook in much less time
- No carving drama
- Less impressive presentation
Spatchcocked Turkey
- Turkey butterflied and flattened
- Cooks much faster (about 90 minutes)
- All skin gets crispy
- Requires a very large roasting tin
- Looks a bit odd but tastes amazing
Timeline: Your Christmas Day Cooking Schedule
For a 5kg turkey, serving dinner at 2pm:
- 6:30am: Get up (sorry), preheat oven
- 7:00am: Turkey in oven, covered with foil
- 9:00am: First basting
- 10:00am: Second basting, put potatoes on
- 10:45am: Remove foil from turkey, third basting
- 11:15am: Final basting
- 11:30am: Check turkey temperature
- 11:45am: Turkey out to rest (use oven for everything else)
- 11:45am-1:45pm: Finish all other cooking, make gravy
- 1:45pm: Carve turkey
- 2:00pm: Serve dinner
Adjust times based on your turkey size and preferred dinner time.
The Bottom Line
Cooking a Christmas turkey isn’t actually that hard—it just takes time and a bit of confidence. Follow the timing formula, use a meat thermometer, rest it properly, and you’ll be fine.
And if it’s a bit dry or slightly overcooked? Loads of gravy fixes everything. That’s what it’s there for.
The most important thing isn’t a perfect turkey—it’s feeding people you love and (hopefully) enjoying the process. Or at least not panicking too much.
You’ve got this. Now set your alarm and get that bird in the oven.
Related: Back to Complete Christmas Food Guide
What’s your turkey cooking disaster story? Or your secret trick for perfect turkey? Share your tips in the comments—we all need the help!